Can you truly master the art of remotely connecting your Internet of Things (IoT) devices, nestled behind the protective walls of a firewall, all from the sleek confines of your Mac, without ever having to resort to the complexities of Windows? The answer is a resounding yes, and the ability to do so unlocks a world of possibilities, from managing your smart home with effortless grace to overseeing complex industrial systems with unwavering precision.
The proliferation of IoT devices has irrevocably transformed the way we interact with technology. We now live in an era where we can control our homes, monitor our businesses, and access critical data from virtually anywhere in the world. This paradigm shift, however, brings with it a unique set of challenges, particularly when it comes to ensuring secure and reliable remote access, especially for users who prefer the macOS operating system.
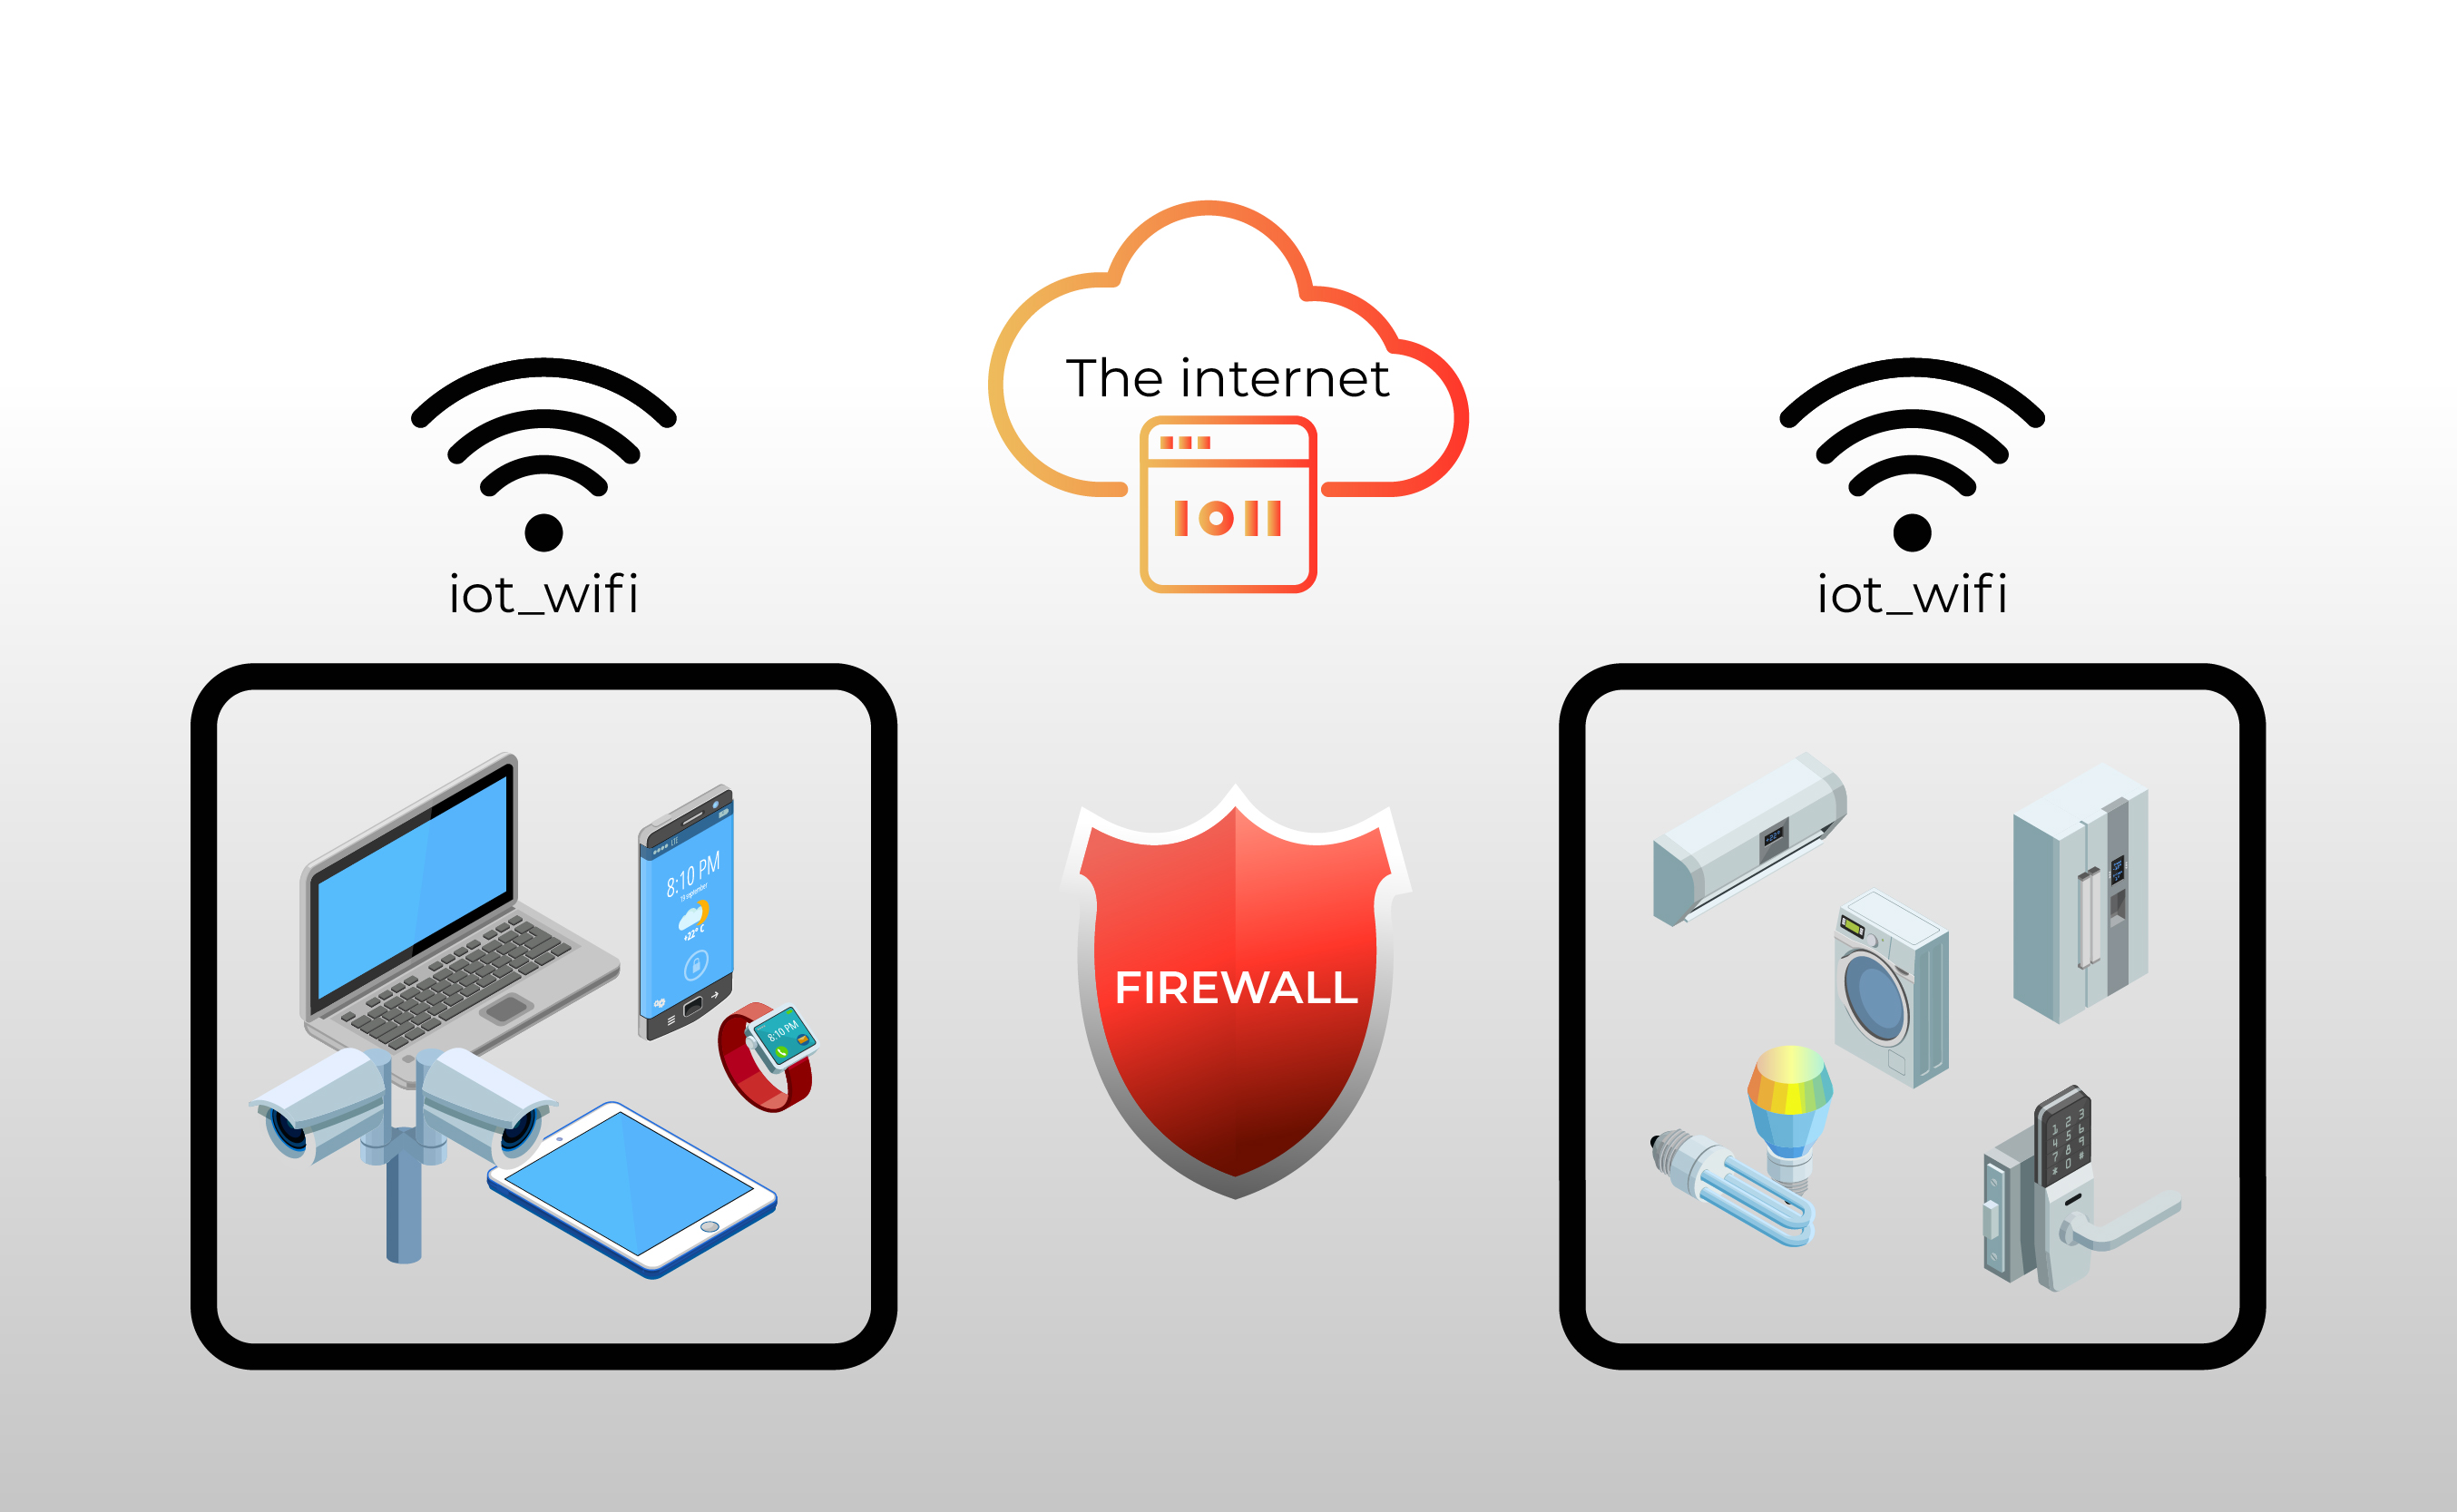
One of the most significant hurdles in this brave new world of interconnected devices is the firewall. Firewalls, designed to protect networks from unauthorized access, can inadvertently become roadblocks to legitimate remote connections. The challenge lies in navigating this digital landscape, enabling secure access without compromising the integrity of the network. This article, tailored for both novices and seasoned tech enthusiasts, will guide you through the intricacies of securely connecting your IoT devices behind a firewall on a Mac. We'll explore practical solutions and expert insights that will empower you to manage your devices with confidence, offering a step-by-step approach to remote access without the need for Windows.
The journey of connecting IoT devices remotely can feel like a maze, especially when a firewall is involved, and your primary workstation is a Mac. Understanding the architecture of IoT networks and firewalls, as well as the techniques to circumvent their limitations, is essential. Whether you're overseeing a smart home ecosystem, managing industrial sensors, or simply accessing remote servers, ensuring secure and dependable connectivity is paramount.
One might reasonably ask, isn't it complicated? The answer is, it can seem so. However, with the proper guidance and the right tools, the task becomes quite manageable. Tools such as ngrok and localtunnel, for example, provide secure and efficient means of establishing remote connections, offering solutions without requiring a financial investment.
This guide meticulously explores the nuances of setting up remote access to your IoT devices, specifically focusing on how to do it on a Mac without resorting to the use of Windows. The objective is to equip you with the knowledge and the practical skills necessary to remain at the forefront of this increasingly dynamic tech landscape. Whether you are a beginner or an advanced user, the information provided should help you troubleshoot common issues. Moreover, the article considers best practices, and strategies to ensure that you can securely manage your IoT devices remotely, and how to do so without incurring additional costs.
Let's explore some of the main tools that can help with the mission of securely connecting an IoT device behind a firewall.
Tools for Secure Remote IoT Access on macOS
To securely access IoT devices behind a firewall from a Mac, several tools and techniques can be employed. Each has its strengths, catering to different needs and technical expertise. Here's a breakdown:
1. Ngrok
Ngrok is a powerful and popular tool that creates secure tunnels to your local devices. It works by creating a public URL that forwards traffic to your local machine, effectively bypassing the firewall. Its particularly useful for testing and debugging IoT applications and services.
- How it works: Ngrok installs on your Mac and listens for incoming connections. You specify which port on your local machine to forward (e.g., port 80 for a web server). Ngrok then assigns a public URL (like `https://your-subdomain.ngrok.io`) to your local service.
- Advantages: Easy to set up, supports HTTPS, provides session inspection and replay features.
- Disadvantages: The free version has limitations on traffic and the number of tunnels. For commercial use, youll need a paid plan.
2. LocalTunnel
LocalTunnel serves a similar purpose to Ngrok, offering a way to expose your local web server to the internet. Its a simpler tool and can be a good alternative if you're looking for something less complex.
- How it works: Similar to Ngrok, you run LocalTunnel on your Mac and specify the port to forward. It creates a public URL that allows access to your local service.
- Advantages: Free and easy to use.
- Disadvantages: Less feature-rich compared to Ngrok; can be less reliable.
3. SSH Tunneling
SSH (Secure Shell) tunneling is a versatile and secure method for creating tunnels. It uses the SSH protocol to encrypt and forward network traffic. This is a highly secure option, particularly suitable for sensitive data.
- How it works: You establish an SSH connection to a server that is publicly accessible. Then, you configure the SSH tunnel to forward traffic from a port on your Mac to the remote IoT device.
- Advantages: Very secure, widely supported, and flexible. You can forward any TCP port.
- Disadvantages: Requires access to a public server (e.g., a VPS) and a good understanding of SSH.
4. VPN (Virtual Private Network)
A VPN creates an encrypted connection over the internet, allowing you to access your IoT devices as if you were on the same local network. This method is secure and suitable for multiple devices.
- How it works: You install a VPN client on your Mac and connect to a VPN server on your network. Once connected, your Mac gets an IP address on your local network, and you can access IoT devices directly.
- Advantages: Secure, allows access to multiple devices, and does not require a public URL.
- Disadvantages: Requires a VPN server setup on your network.
5. Port Forwarding on Router
If your firewall is a router, you can configure port forwarding to allow external access to specific ports on your IoT devices. This method is straightforward but less secure.
- How it works: In your routers configuration settings, you specify the port number and the internal IP address of your IoT device. The router then forwards incoming traffic on that port to the specified device.
- Advantages: Easy to set up, especially if your device has a static IP address.
- Disadvantages: Exposes your device directly to the internet, making it vulnerable if not properly secured.
6. Reverse Proxy Servers
A reverse proxy server acts as an intermediary between the internet and your IoT devices. It receives requests from the internet and forwards them to the appropriate device on your local network. Reverse proxies can enhance security and performance by caching content, load balancing traffic, and providing SSL encryption.
- How it works: You install a reverse proxy server like Nginx or Apache on a server accessible from the internet. You configure the proxy to forward requests to the IoT devices on your local network.
- Advantages: Enhanced security, improved performance, and centralized management.
- Disadvantages: Requires setting up and maintaining a reverse proxy server and configuring it correctly.
When choosing a method, consider your technical expertise, security needs, and the nature of your IoT devices. For instance, SSH tunneling is suitable for secure, one-off access, while a VPN is better for multiple devices and ongoing remote access.
The key to success is a systematic approach. Ensure a solid understanding of the basics of IoT networking, firewalls, and the tools at your disposal. Regularly troubleshoot the common issues. Additionally, remember to implement the best practices to ensure you are staying ahead of the curve.
Ultimately, the art of securely connecting to your IoT devices behind a firewall on a Mac is a skill within reach. You just need the right tools, the right knowledge, and a willingness to explore.
Here's a table providing a concise summary of the key aspects of each method:
| Method | Description | Pros | Cons | Use Cases |
|---|---|---|---|---|
| Ngrok | Creates secure tunnels using public URLs. | Easy setup, supports HTTPS, session inspection. | Limited traffic in free version, requires an account. | Testing and debugging, temporary access. |
| LocalTunnel | Simple tool to expose local web servers. | Free and easy to use. | Less feature-rich, potentially less reliable. | Quick access and simple needs. |
| SSH Tunneling | Uses SSH to encrypt and forward traffic. | Highly secure, flexible. | Requires SSH access, understanding of SSH. | Secure remote access, forwarding specific ports. |
| VPN | Creates an encrypted connection over the internet. | Secure, allows access to multiple devices. | Requires a VPN server setup. | Accessing multiple devices, secure remote access. |
| Port Forwarding | Configures your router to forward traffic. | Simple setup. | Exposes devices to the internet, less secure. | Basic remote access. |
| Reverse Proxy Servers | Acts as an intermediary between the internet and your IoT devices. | Enhanced security, improved performance, and centralized management | Requires setting up and maintaining a reverse proxy server and configuring it correctly. | Web applications, remote access with security. |
It's also crucial to consider that as IoT adoption expands, a deeper comprehension of how to set up secure remote access without relying on Windows has become essential. Remember that the security posture of your IoT devices and your network should never be taken lightly.
In addition to understanding the tools, there are certain crucial steps to go through to ensure a secure remote connection. Let's delve deeper into this.
Step-by-Step Guide to Remote Access on macOS
Whether you are a beginner or an experienced user, the journey to remotely connect your IoT devices behind a firewall on your Mac can be broken down into several manageable steps. This guide will ensure you achieve secure and efficient remote access without compromising your network's security.
1. Assess Your Network Setup
Before you begin, you need to understand your network configuration. This includes:
- Firewall Type: Identify whether your firewall is a hardware router, software firewall on your Mac, or a combination. Each type requires a different approach.
- Router IP Address and Subnet: Know your routers IP address (usually something like 192.168.1.1 or 10.0.0.1) and the subnet mask. This information is critical for port forwarding or VPN configuration.
- IoT Device IP Address: Determine the static or dynamic IP address assigned to your IoT device. Its best to assign a static IP to ensure a consistent connection.
2. Choose Your Method
Based on your network setup, choose the most appropriate method from the options discussed earlier. If you have a basic setup, port forwarding or a simpler tunneling tool like LocalTunnel may suffice. For more complex requirements, SSH tunneling or a VPN is recommended.
3. Configure Your Mac
The steps vary depending on the chosen method:
- Ngrok/Localtunnel: Download and install the tool. Run the tool on your Mac and specify the port of your IoT device (e.g., port 8080).
- SSH Tunneling: Use the Terminal on your Mac to establish an SSH connection to a server with public access. Configure the SSH tunnel to forward a local port to the port of your IoT device.
- VPN: Install a VPN client (e.g., Tunnelblick, OpenVPN) on your Mac and configure it to connect to your VPN server.
- Port Forwarding: Access your routers configuration (usually via a web browser), and navigate to the port forwarding settings. Add a rule to forward traffic from an external port to the internal IP address and port of your IoT device.
4. Configure Your IoT Device
Some IoT devices require additional configuration:
- Static IP Address: Configure your IoT device to use a static IP address. This can usually be done in the devices settings or via your routers DHCP configuration.
- Port Configuration: Ensure your IoT device is listening on the correct port (e.g., 80 for HTTP, 22 for SSH).
- Device Settings: Check the device's settings for any necessary configurations related to remote access. Some devices may require specific settings to be enabled.
5. Test the Connection
Once you have configured everything, it's time to test the connection:
- Ngrok/LocalTunnel: Use the public URL provided by the tool to access your IoT device from a web browser.
- SSH Tunneling: Use an SSH client (e.g., Terminal) on your Mac to connect to the local port that is forwarding traffic to your IoT device.
- VPN: After connecting to the VPN, try accessing your IoT device's IP address from your Mac's web browser.
- Port Forwarding: Use your public IP address and the external port you configured in your routers settings to access your IoT device from a web browser (e.g., `http://your-public-ip:external-port`).
6. Secure Your Connection
Security is paramount. Always:
- Use Strong Passwords: Change default passwords on your IoT devices and use strong, unique passwords.
- Enable Encryption: Where possible, use HTTPS or other encryption methods for communication.
- Keep Firmware Updated: Regularly update your IoT devices firmware to patch security vulnerabilities.
- Implement Network Segmentation: Consider placing your IoT devices on a separate VLAN to isolate them from your primary network.
- Use Mac Filtering: On your router, if possible, enable MAC filtering to limit access to the specific MAC addresses of your IoT devices.
7. Troubleshooting
If you encounter issues, start by:
- Checking the Basics: Ensure both your Mac and your IoT device are connected to the internet and powered on.
- Firewall Settings: Verify that your Mac's firewall and router's firewall aren't blocking the necessary ports.
- IP Addresses: Confirm that youre using the correct IP addresses.
- Logs: Check the logs of your IoT device, the tool you are using (e.g., Ngrok), and your router for error messages.
By following these steps, you can confidently set up secure remote access to your IoT devices on your Mac. The goal is to not only establish a connection, but also to maintain it securely, and efficiently.
Remote connect IoT behind firewall mac free solutions allow users to access, manage, and monitor their devices without compromising security or incurring additional costs. This can be a cost-effective solution, but it's important to weigh the costs of your time as well. A secure network requires a constant level of maintenance.
A crucial concept to consider is the benefits of remote IoT connectivity. Let's explore some of those:
Key Benefits of Remote IoT Connectivity
The ability to remotely connect to your IoT devices unlocks a multitude of benefits, revolutionizing how we manage and interact with technology. Whether you're a business owner, a homeowner, or a tech enthusiast, remote IoT connectivity offers significant advantages.
1. Enhanced Accessibility and Control
The primary advantage of remote IoT connectivity is the ability to access and control your devices from anywhere in the world. This means:
- Real-time Monitoring: Monitor the status of your devices in real-time, whether it's checking the temperature of a sensor, the status of a machine, or the security of your home.
- Remote Management: Remotely manage and configure your devices. You can adjust settings, update software, or troubleshoot issues without being physically present.
- Increased Efficiency: Automate tasks and processes, leading to increased operational efficiency. You can schedule operations, receive alerts, and respond to events immediately.
2. Improved Security and Monitoring
Remote connectivity enhances security by:
- Remote Surveillance: Monitor security cameras and sensors to detect and respond to security breaches in real-time.
- Alarm Systems: Arm and disarm alarm systems remotely and receive instant alerts.
- Data Logging and Analysis: Log data and perform remote analytics to identify potential risks, such as equipment failures or energy inefficiencies.
3. Cost Savings
Remote IoT connectivity can significantly reduce costs:
- Reduced On-site Visits: Minimize the need for physical on-site visits for maintenance, troubleshooting, or repairs.
- Predictive Maintenance: Predict equipment failures through remote monitoring, allowing proactive maintenance and preventing costly downtime.
- Energy Efficiency: Optimize energy usage by remotely controlling devices and automating energy-saving measures.
4. Flexibility and Convenience
Remote IoT connectivity offers unparalleled flexibility and convenience:
- Work from Anywhere: Manage your home, business, or other assets from anywhere with an internet connection.
- Personalized Experience: Customize your device interactions and receive personalized notifications based on your preferences.
- Seamless Integration: Integrate with other smart devices and services to create a more cohesive and automated ecosystem.
5. Scalability
As your needs grow, remote IoT connectivity allows you to easily scale your operations:
- Add Devices: Easily add new devices to your network and integrate them into your remote management system.
- Expand Capabilities: Expand your system's capabilities by integrating new features and functionalities.
- Remote Updates: Perform remote software updates and configuration changes across all of your connected devices.
6. Improved Decision-Making
The data gathered from remote IoT devices supports better decision-making:
- Data-driven Insights: Gather valuable data on performance, usage, and behavior to make informed decisions.
- Improved Business Processes: Optimize business processes by analyzing data and identifying areas for improvement.
- Competitive Advantage: Gain a competitive edge by leveraging data to provide better services and improve operational efficiency.
The advantages of remote IoT connectivity are vast and transformative. From enhancing security and reducing costs to boosting convenience and improving decision-making, the ability to connect to your devices from anywhere in the world is becoming indispensable in today's technology-driven world.
This section provides a thorough analysis. The next consideration is how to avoid common obstacles.
Troubleshooting Common Issues
Even with careful planning and execution, you might encounter some challenges when setting up remote IoT connections. Understanding these common issues and how to troubleshoot them is key to a smooth experience.
1. Network Connectivity Issues
Problem: The most common issue is the lack of a stable network connection. Your Mac and your IoT device both need a reliable internet connection.
Solutions:
- Check Your Internet Connection: Ensure your Mac and IoT device are connected to the internet. Verify the Wi-Fi signal strength and the network connection on your Mac.
- Test the Device's Network: Try pinging the IoT device from your Mac (using the device's IP address) to check for basic connectivity.
- Restart Devices: Restart your Mac, IoT device, and router to resolve temporary network issues.
- Check Router Settings: Ensure your router is not blocking the necessary ports or traffic for your IoT device.
- Wired vs. Wireless: For better stability, consider connecting your IoT device via Ethernet cable.
2. Firewall Conflicts
Problem: Firewalls (both on your Mac and your router) can block incoming and outgoing connections.
Solutions:
- Mac Firewall: Check your Mac's firewall settings in System Preferences > Security & Privacy > Firewall. Ensure that the necessary ports are open for your IoT device or the tool you're using (e.g., Ngrok).
- Router Firewall: Configure port forwarding rules in your router's settings. Add rules to allow incoming traffic on the necessary ports to your IoT device's IP address.
- DMZ (Demilitarized Zone): As a last resort (use with caution!), you can place your IoT device in a DMZ on your router. This essentially bypasses the router's firewall for that device, but it also exposes it to potential security risks.
- Firewall Logs: Check your router's firewall logs for any blocked connections. This can help you identify the blocked ports or devices.
3. Incorrect IP Addresses and Ports
Problem: Misconfiguration of IP addresses and ports can lead to connection failures.
Solutions:
- Static IP Address: Assign a static IP address to your IoT device. This ensures the IP address remains consistent. You can do this in the device's settings or through your router's DHCP configuration.
- Correct Port Numbers: Double-check that you're using the correct port numbers for your IoT device. Common ports include 80 (HTTP), 443 (HTTPS), 22 (SSH). Consult your device's documentation.
- Port Forwarding: Ensure that your port forwarding rules in the router correctly forward external ports to the correct internal IP address and port of your IoT device.
- Verify Network Settings: Confirm that your Mac is using the correct network settings (IP address, subnet mask, gateway, and DNS servers).
4. Issues with Remote Access Tools
Problem: Problems with the tools themselves, such as Ngrok or localtunnel, can prevent connections.
Solutions:
- Tool Configuration: Carefully review the configuration steps for your chosen tool (Ngrok, LocalTunnel, SSH tunneling, VPN). Make sure the tool is running correctly and configured with the right settings.
- Firewall Rules: Ensure that your Mac's firewall allows the tool to access the internet.
- Tool Logs: Check the logs of the remote access tool for error messages or hints about connection issues.
- Software Updates: Update the remote access tool to the latest version, and check for any known issues or bugs.
- Alternative Tools: If one tool fails, try another tool. For instance, if Ngrok is not working, try LocalTunnel or SSH tunneling.
5. IoT Device Configuration
Problem: Incorrect settings on the IoT device itself can prevent remote access.
Solutions:
- Device Settings: Verify that the IoT device is configured to accept remote connections. Check the device's settings for options like "remote access," "enable HTTP," or "enable SSH".
- Authentication: Ensure that you have the correct login credentials for your IoT device (username and password).
- Compatibility: Confirm that the IoT device is compatible with the method you are using to connect remotely.
- Firmware Updates: Ensure that the IoT device has the latest firmware installed. Firmware updates often include bug fixes and security improvements.
6. Security and Encryption
Problem: Lack of security and encryption can make your devices vulnerable.
Solutions:
- Strong Passwords: Use strong and unique passwords for your devices and accounts.
- Encryption: Use HTTPS or other encryption methods (SSL/TLS) to secure communication.
- Network Segmentation: Consider placing your IoT devices on a separate VLAN to isolate them from your primary network.
- Regular Updates: Keep your device's software updated.
- Mac Filtering: Use MAC filtering.
By addressing these common issues step-by-step, you will increase your chances of a successful remote connection.
The information presented in this article provides a comprehensive understanding of how to connect your IoT devices. Security is a non-negotiable aspect of establishing remote connections, and the information here offers practical solutions to this challenge.